imgaug를 이용하여 바운딩박스 정보를 포함한 이미지 증폭시키기
Object Detection 문제를 포함하여 딥러닝을 이용한 영상인식 접근 방법은 많은 수의 학습 이미지가 요구된다. 직접적으로 최대한 확보할 수 있는 이미지의 수가 적절한 모델을 학습하기에 충분하지 않을 경우에는 원본 이미지에 약간씩의 변형을 줌으로써 새 이미지들을 생성하는 image augmentation 방법을 고려할 수 있다.
Object Detection 문제에서는 보유한 학습 이미지 데이터에 대해 Supervised learning을 위한 bounding-box labeling 작업이 포함되어 있다. 100장의 원본 이미지가 있을 때, 100개의 Annotation(bounding-box 정보를 포함한 정답 label)을 만들어야 하는데 Annotation 생성은 수작업으로 이뤄진다. 그렇다면, 만약 image augmentation을 통해 100장의 이미지를 10000장으로 증가시켰다면, 새로 생성된 9900장에 대해서 다시 Anntation을 만들어야 하는 것일까?
물론 이미지 수를 늘릴 때, 원본 이미지의 크기나, 방향은 유지하면서 색상 필터나 노이즈를 추가하는 경우에는 큰 문제가 되지 않는다. 그러나 image augmentation에는 이미지의 회전, 반전, 사이즈 축소 및 확대 등도 포함되어 있다. 이에 따라 이미지를 증폭시키면 변형된 이미지에 새로 Annotation labeling 작업을 수행해야 하는가 걱정이 앞선다.
하지만 다행이도, 다행이도 이를 위한 도구가 제공되고 있다.
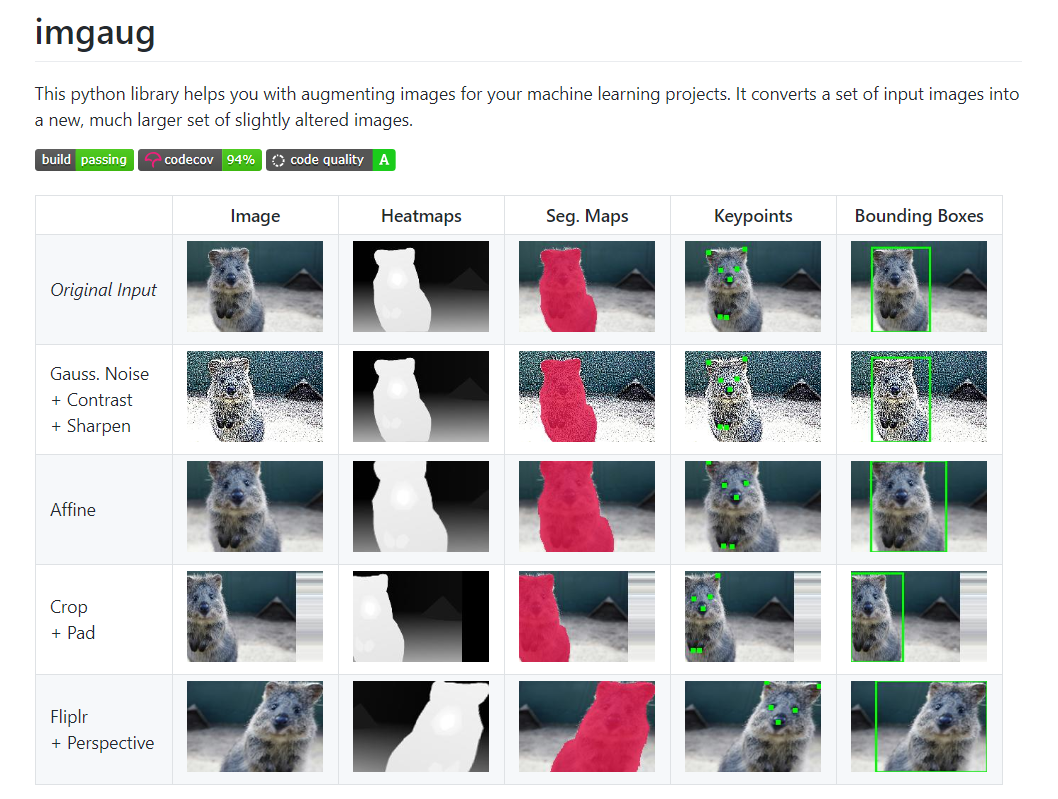
Python 라이브러리 imgaug를 사용하면 Annotation을 포함한 이미지 증폭을 수행할 수 있다. 예를 들어, 이미지를 증가시키는 동안 이미지가 회전하면 라이브러리는 그에 따라 모든 객체의 Bounding-box를 함께 회전 시킨다.
- Image augmentation for machine learning - imgaug
imgaug를 이용하면 여러 학습 이미지를 새롭게 변경된 새 이미지 세트로 변환할 뿐만 아니라 bounding-box 정보, land mark 정보, segmentation map 정보 등을 새로 변환된 이미지에 적용된 상태로 유지할 수 있다.
imgaug installation
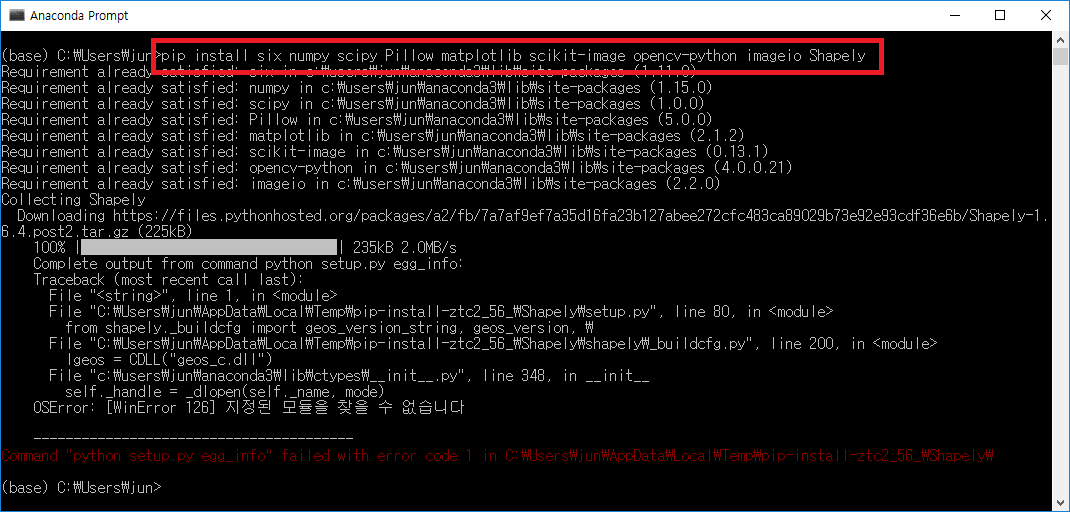
pip install six numpy scipy Pillow matplotlib scikit-image opencv-python imageio Shapely
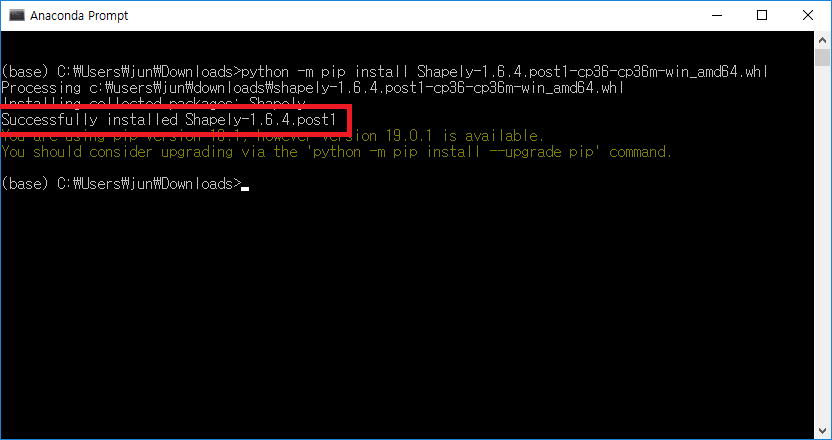
imgaug를 위한 사전 모듈들을 설치하는 과정에서 Shapely 모듈이 정상적으로 설치되지 않았다.
현재 pip로 Shapley가 정상 설치 되지 않았기에 직접 whl 파일을 다운받고 설치해줄 필요가 있다.
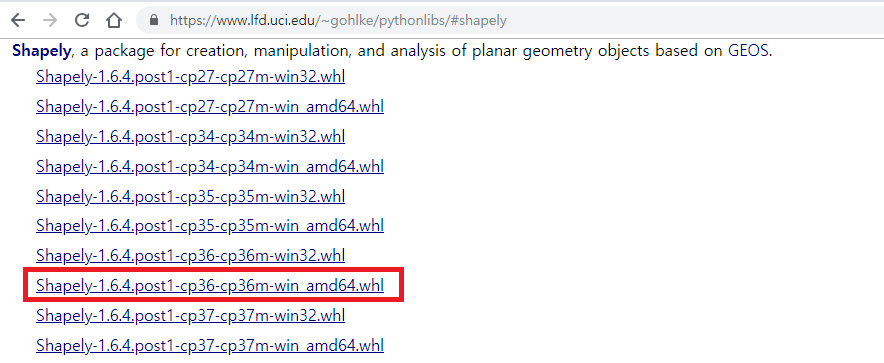
다운로드 받을 때 자신의 Python 버전에 맞춰서 받아야 한다. cp36은 Python 3.6 버전을 의미한다.
다운로드 받았으면, 받은 경로로 이동하여 whl 파일을 실행한다.
python -m pip install Shapely-1.6.4.post1-cp36-cp36m-win_amd64.whl
imgaug 모듈 설치하기
pip install imgaug
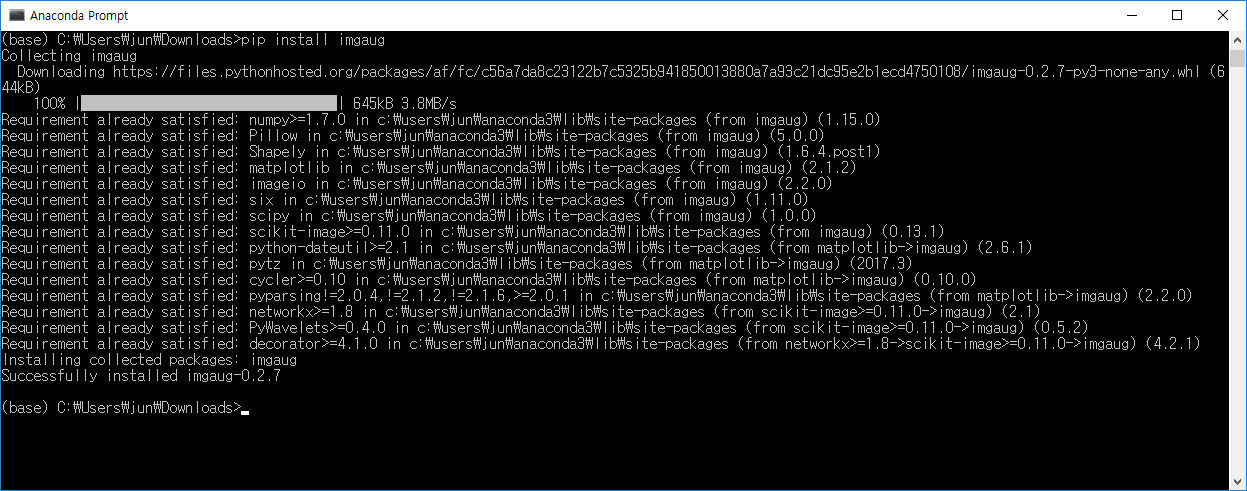
imgaug가 정상적으로 설치되었다.
Bounding-box image augmentation
Bounding-box에 대한 imgaug 라이브러리의 지원 기능은 다음과 같다:
- Bounding-boxes를 객체로 표현한다 (imgaug.BoundingBox).
- Bounding-boxes를 이미지와 함께 증가시킨다.
- 이미지에 Bounding-box를 그린다.
- 이미지에 경계 상자 이동 / 이동, 다른 이미지 (예 : 크기 조정 후 동일한 이미지)로 투영하고, 교집합/합집합 및 IoU 값을 계산한다.
먼저, Examples: Bounding Boxes의 A simple example을 적용해보는 것부터 시작한다.
Python에서 Image와 Annotation 정보 읽기
Annotation.xml 파일은 아래와 같은 PASCAL VOC 구조로 되어있다고 가정한다.
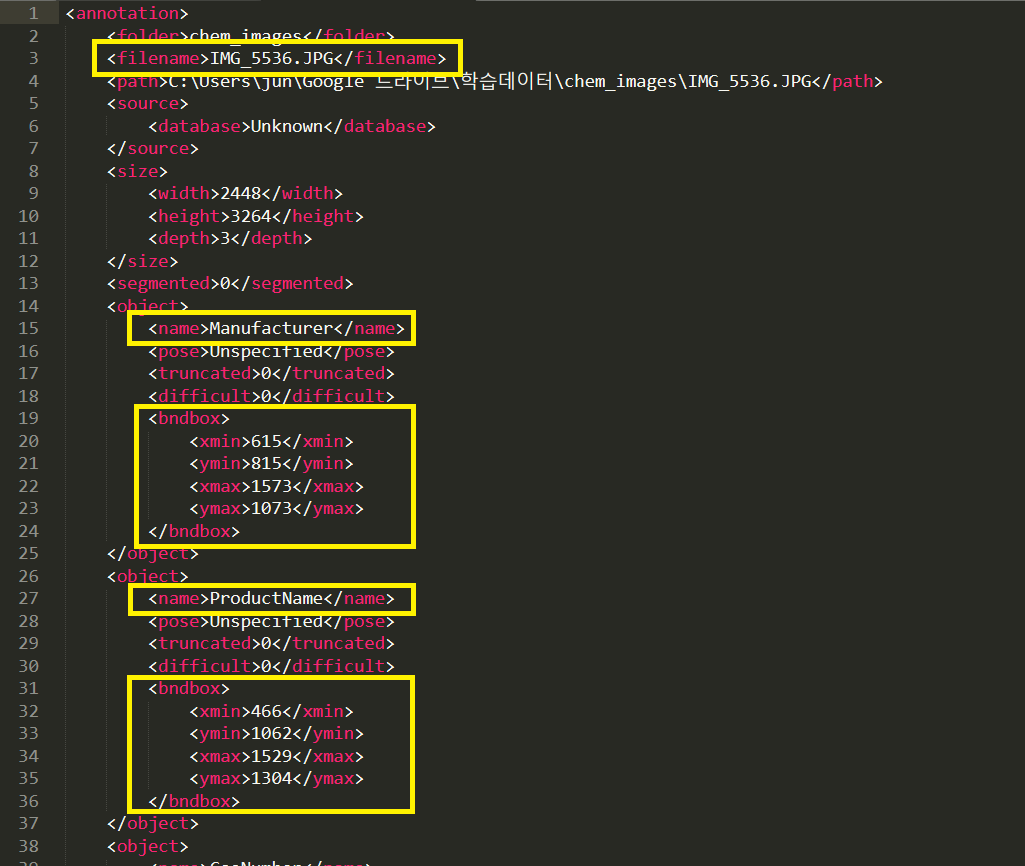
읽어야하는 부분은 이미지 내의 각 객체(Object) 클래스와 Bounding-box 좌표 정보이다.
다음은 Python에서 xml모듈을 이용하여 xml 구조를 파싱하는 코드이다. 한 이미지에 대한 Annotation(PASCAL VOC)으로부터 해당하는 이미지 filename과 이미지 내의 모든 Bounding-Box 정보를 읽어서 반환한다.
import xml.etree.ElementTree as ET

def read_anntation(xml_file: str):
    tree = ET.parse(xml_file)
    root = tree.getroot()

    bounding_box_list = []

    file_name = root.find('filename').text
    for obj in root.iter('object'):

        object_label = obj.find("name").text
        for box in obj.findall("bndbox"):
            x_min = int(box.find("xmin").text)
            y_min = int(box.find("ymin").text)
            x_max = int(box.find("xmax").text)
            y_max = int(box.find("ymax").text)

        bounding_box = [object_label, x_min, y_min, x_max, y_max]
        bounding_box_list.append(bounding_box)

    return bounding_box_list, file_name
read_train_dataset 함수는 image 파일들과 각 이미지의 annotation xml 파일들이 함께 있는 디렉토리의 경로를 인자로 전달했을 때, 4차원(N:이미지 수, W:이미지 너비, H:이미지 높이, D:RGB) nparray로 변환된 이미지들과 3개의 항(bounding-box 리스트, xml 파일명, 관련 이미지 파일명)을 갖는 Annotation 투플의 리스트를 반환한다.
from os import listdir
import cv2
import numpy as np

def read_train_dataset(dir):
    images = []
    annotations = []

    for file in listdir(dir):
        if 'jpg' in file.lower() or 'png' in file.lower():
            images.append(cv2.imread(dir + file, 1))
            annotation_file = file.replace(file.split('.')[-1], 'xml')
            bounding_box_list, file_name = read_anntation(dir + annotation_file)
            annotations.append((bounding_box_list, annotation_file, file_name))

    images = np.array(images)

    return images, annotations
A simple example의 코드를 아래와 같이 수정하여, 가지고 있는 이미지와 해당 Annotation 정보에 적용한다.
import imgaug as ia
from imgaug import augmenters as iaa
from files import *

ia.seed(1)

dir = 'images/'
images, annotations = read_train_dataset(dir)

for idx in range(len(images)):
    image = images[idx]
    boxes = annotations[idx][0]

    ia_bounding_boxes = []
    for box in boxes:
        ia_bounding_boxes.append(ia.BoundingBox(x1=box[1], y1=box[2], x2=box[3], y2=box[4]))
    bbs = ia.BoundingBoxesOnImage(ia_bounding_boxes, shape=image.shape)

    seq = iaa.Sequential([
        iaa.Multiply((1.2, 1.5)),
        iaa.Affine(
            translate_px={"x": 40, "y": 60},
            scale=(0.5, 0.7)
        )
    ])

    seq_det = seq.to_deterministic()

    image_aug = seq_det.augment_images([image])[0]
    bbs_aug = seq_det.augment_bounding_boxes([bbs])[0]

    for i in range(len(bbs.bounding_boxes)):
        before = bbs.bounding_boxes[i]
        after = bbs_aug.bounding_boxes[i]
        print("BB %d: (%.4f, %.4f, %.4f, %.4f) -> (%.4f, %.4f, %.4f, %.4f)" % (
            i,
            before.x1, before.y1, before.x2, before.y2,
            after.x1, after.y1, after.x2, after.y2)
        )

    image_before = bbs.draw_on_image(image, thickness=20)
    image_after = bbs_aug.draw_on_image(image_aug, thickness=20, color=[0, 0, 255])

    cv2.imshow('image_before', cv2.resize(image_before, (380, 640)))
    cv2.imshow('image_after', cv2.resize(image_after, (380, 640)))

    cv2.waitKey(0)
아래 이미지는 image augmentation(원본 이미지 축소)을 적용하기 전 이미지와 적용한 이후의 이미지 결과이다. 원본 이미지의 Bounding-box가 축소된 이미지에서도 비율에 맞춰서 적용되어 있는 것을 확인할 수 있다.
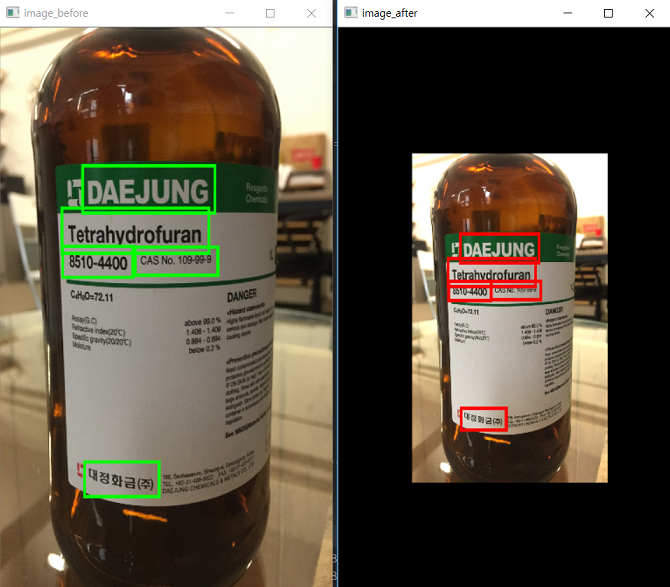
Bounding-box가 있는 이미지, 원본(왼쪽) 및 augmentation 이후 (오른쪽).
콘솔 출력 결과:
BB 0: (615.0000, 815.0000, 1573.0000, 1073.0000) -> (905.7255, 1211.4296, 1468.9925, 1363.1236)
BB 1: (466.0000, 1062.0000, 1529.0000, 1304.0000) -> (818.1193, 1356.6560, 1443.1222, 1498.9427)
BB 2: (1006.0000, 1287.0000, 1594.0000, 1434.0000) -> (1135.6184, 1488.9473, 1481.3397, 1575.3776)
BB 3: (471.0000, 1285.0000, 969.0000, 1446.0000) -> (821.0591, 1487.7714, 1113.8638, 1582.4332)
BB 4: (632.0000, 2541.0000, 1162.0000, 2725.0000) -> (915.7209, 2226.2509, 1227.3404, 2334.4357)
원본 이미지를 어떠한 방식으로 augmentation 할 것인지는 iaa.Sequential 부분을 수정함으로써 결정할 수 있다.
seq = iaa.Sequential([
        iaa.Multiply((1.2, 1.5)),
        iaa.Affine(
            translate_px={"x": 40, "y": 60},
            scale=(0.5, 0.7),
            rotate=45  # 이미지 회전 추가
        )
    ])
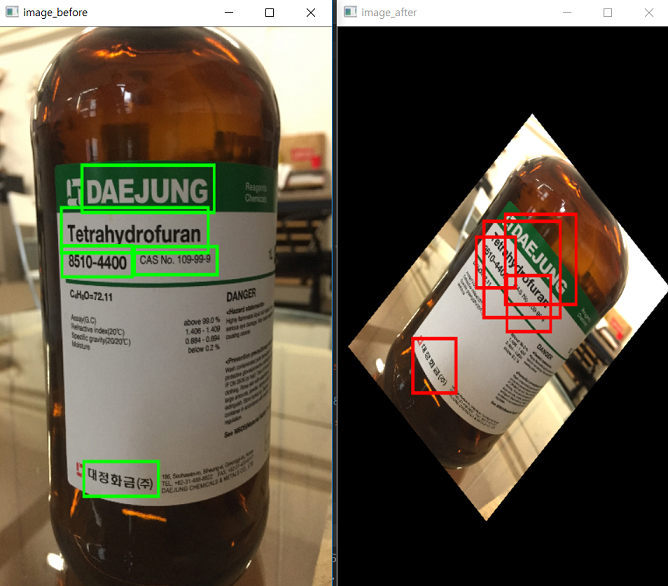
다음은 rotate=45 옵션을 추가했을 때의 결과이다. 역시 Bounding-box가 변형된 이미지에 맞춰서 수정되었음을 확인할 수 있다.
보다 다양한 옵션들은 Examples: Basics에서 확인 할 수 있다.
Saving augmenting images and annotations
imgaug를 이용하여 학습용 원본 이미지를 Bounding-box와 함께 augmenting 하는 방법을 알아봤다. 이제 변환된 이미지와 함께 annotation 파일을 저장하기만 하면 된다.
새로운 이미지의 Annotation 정보를 담는 xml 문서는 pascal-voc-writer 모듈을 기반으로 생성한다.
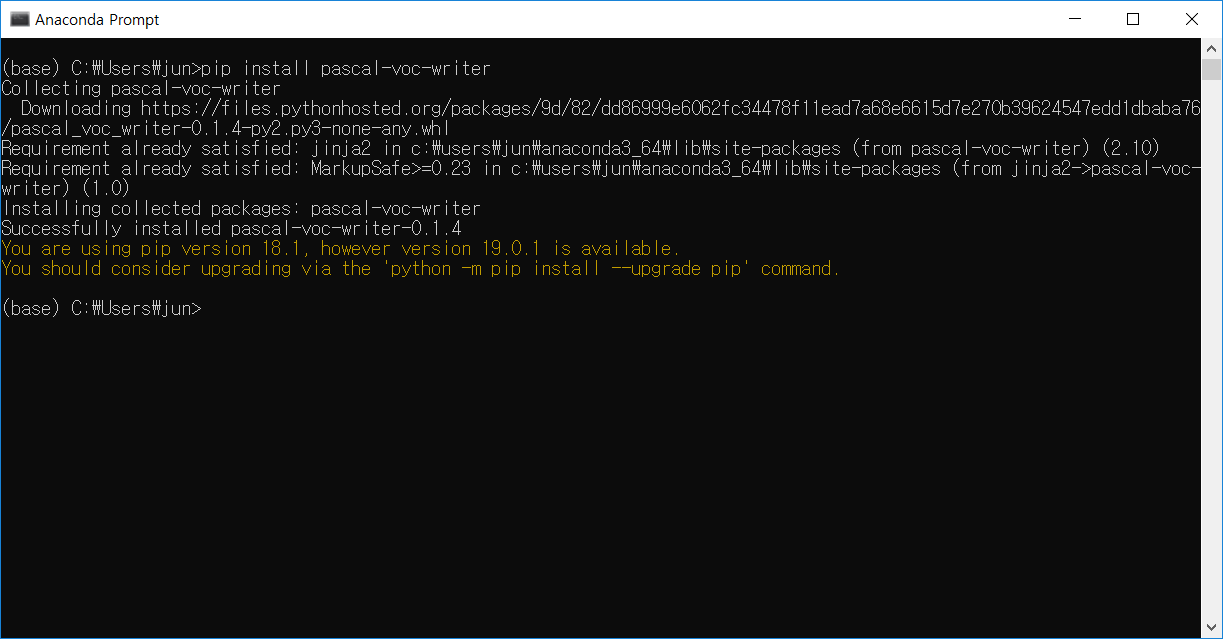
pascal-voc-writer 모듈은 pip를 이용하여 설치할 수 있다.
pip install pascal-voc-writer
imgaug와 pascal-voc-writer를 이용한 이미지 생성 및 저장 코드 예제:
import imgaug as ia
from imgaug import augmenters as iaa
from files import *
from pascal_voc_writer import Writer

ia.seed(1)

dir = 'images/'
images, annotations = read_train_dataset(dir)

for idx in range(len(images)):
    image = images[idx]
    boxes = annotations[idx][0]

    ia_bounding_boxes = []
    for box in boxes:
        ia_bounding_boxes.append(ia.BoundingBox(x1=box[1], y1=box[2], x2=box[3], y2=box[4]))

    bbs = ia.BoundingBoxesOnImage(ia_bounding_boxes, shape=image.shape)

    seq = iaa.Sequential([
        iaa.Multiply((1.2, 1.5)),
        iaa.Affine(
            translate_px={"x": 40, "y": 60},
            scale=(0.5, 0.7),
            rotate=45
        )
    ])

    seq_det = seq.to_deterministic()

    image_aug = seq_det.augment_images([image])[0]
    bbs_aug = seq_det.augment_bounding_boxes([bbs])[0]

    new_image_file = dir + 'after_' + annotations[idx][2]
    cv2.imwrite(new_image_file, image_aug)

    h, w = np.shape(image_aug)[0:2]
    voc_writer = Writer(new_image_file, w, h)

    for i in range(len(bbs_aug.bounding_boxes)):
        bb_box = bbs_aug.bounding_boxes[i]
        voc_writer.addObject(boxes[i][0], int(bb_box.x1), int(bb_box.y1), int(bb_box.x2), int(bb_box.y2))

    voc_writer.save(dir + 'after_' + annotations[idx][1])
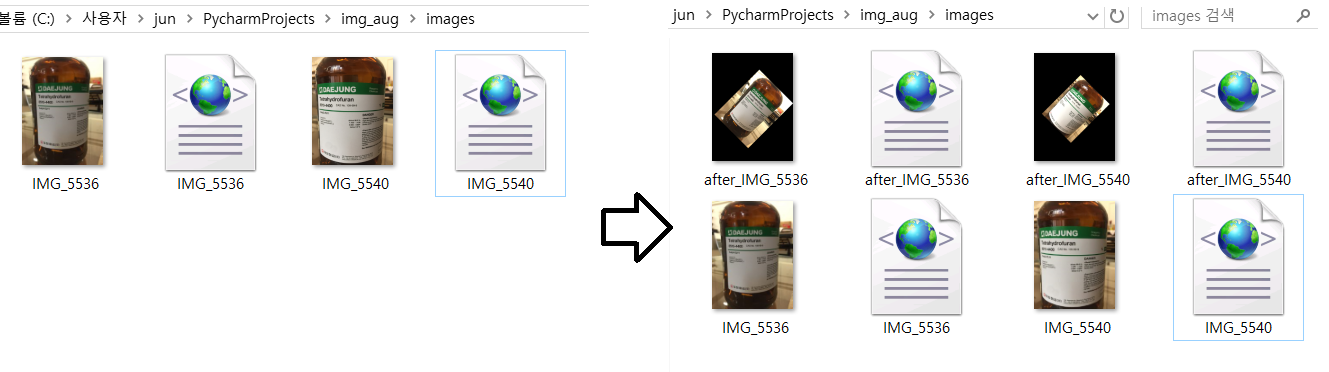
동일 디렉토리 내에 image set과 annotation set을 준비한 후 프로그램 실행하면 아래와 같은 결과를 얻을 수 있다. 기호에 맞춰 코드를 수정해서 사용하도록 하자.